
Materials: Pax wardrobes (1 large, 2 medium and 1 small), Various komplement peices and pax bergsbo / frosted glass doors, Martha Stewart living Paint #MSLO29 "glass of milk", poplar moldings 1x2 and 1x3. Crown molding 1x 5/16. Plaster, paint, Hammer, Screwgun, Level, Screw Driver
Description: I converted a basic reach in closet in a small bedroom into two stunning custom closets that look like a $5000 custom "California Closet" systems. One large closet in the bedroom and one small linen closet in the hallway.


The Original closet was 7' wide and 2'6" deep. The bifold door opening was about 4' wide and 80" tall. I completely gutted the closet down to the studs including the walls, ceiling and the framing around the closet door.
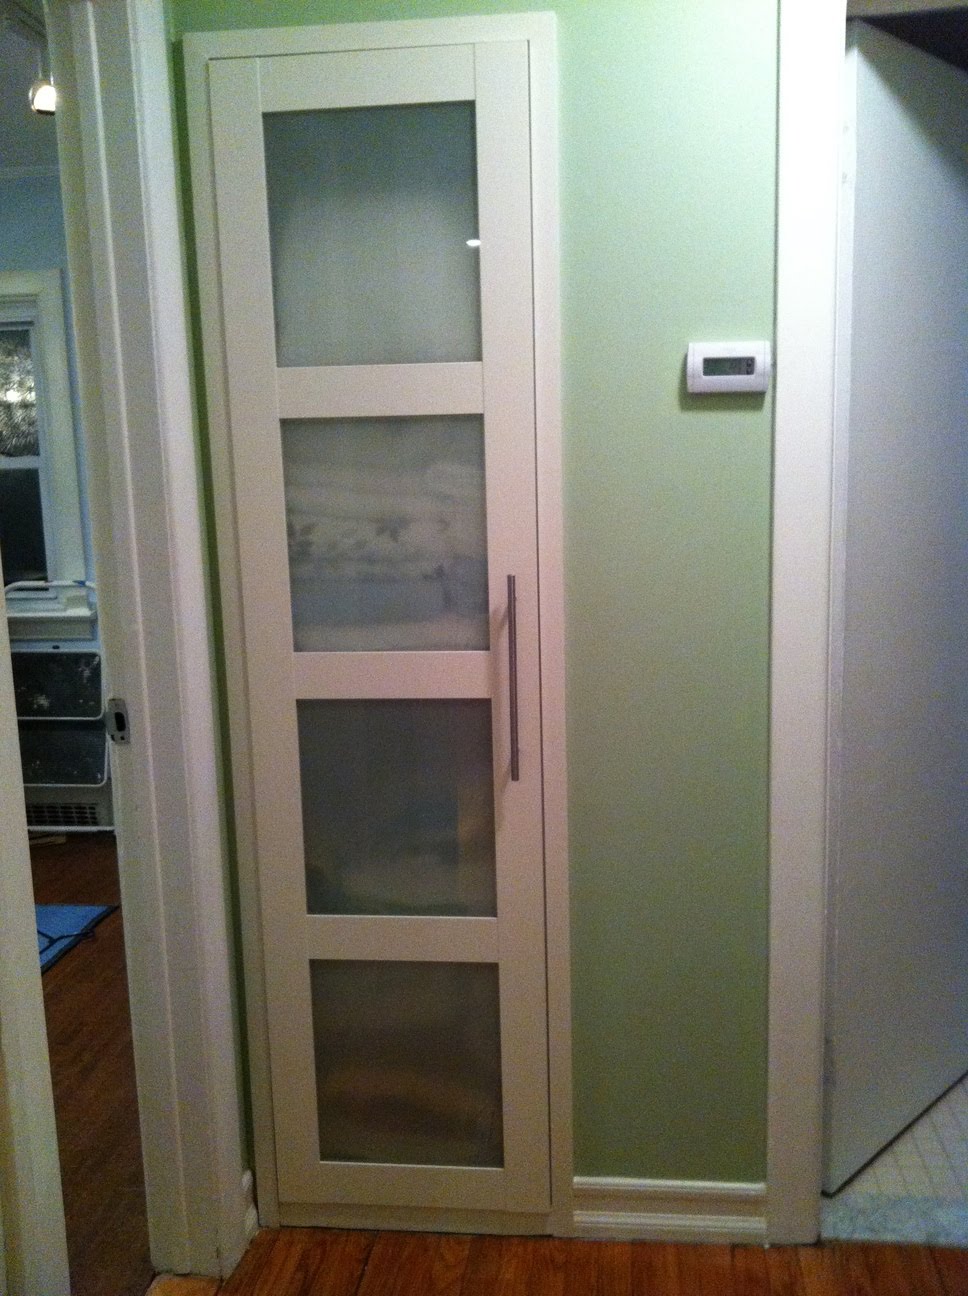
I cut out a space in the hallway to the right of the original closet space, framed in and finished a cove 20" wide, 79"tall and 16" deep. In that cove I installed a small pax wardrobe,(pax wardrobe 598.418.77), the wardrobe fits perfectly after i cut off 8" from the back. I finished it by applying a 1x2 poplar molding around the wardrobe, adding a pax bergso / frosted glass door and matching paint framing it in giving it a complete streamline look.
Back to the bedroom, I applied drywall (sheetrock) on the walls and ceiling making the closet space flush with all the room surfaces. The open cove dimensions were 79"w, 95"h (same as ceiling) and 23" deep.
I inserted pre assembled pax wardrobe frames into the cove, one large pax wardrobe frame (700.140.13) and two smaller pax frames (100.140.30). I shimmed the frames so they all lined up evenly and then secured them to the wall.

I made the wardrobes look more complete and custom by adding 1" x 3" poplar molding around the room and under the closet, on the front. Also across the top flush with the closet. I also added the crown molding in the room across the top of the closet achieving the streamline custom look i wanted. The molding was painted with Martha Stewart living Paint #MSLO29 "glass of milk".
All of the moldings were painted with "Martha Stewart" Paint (MSLO29)"GLASS OF MILK", it matches the Pax "bergsbo" doors perfectly creating a dramatic style.
~ Ilir Bitici, Berkeley Heights, New Jersey

Materials: Pax
Description: I decided to decorate the back of my Pax Tonnes with newapaper from the 60s and 80s. It took a weekend to cover all 200x236 cm.


~ Samuele Orsini, Italy

Materials: Three single Pax doors, gypse and screws...
Description: Simply installed three single Pax doors in front of my walk-in. Two of the doors are fixed into the floor, and the third one can glide either on the left or on the right... The lights are doing the rest of the job!


~ Olivier Visentin, Montréal, Canada

Materials: Pax Fevik wardrobe door, DIODER led lights, some wood and two hooks
Description: I have always been a big fan of mood lighting and the low cost of IKEA lamps has allowed me to experiment with creating the perfect balance of functional and mood light.
So I decided to make a light panel for my recently purchased toy, a large plasma TV.
I had two packs of DIODER coloured led lights from some previous experiments, and set off to IKEA to find a glass panel door. I wanted a frosted glass panel as I figured this would diffuse the rather harsh lighting of the DIODER led's.
Click to read more>>

Materials: Laiva TV Stand, Pax Wardrobe door
Description: I picked up a Pax Fevik wardrobe panel in the as-is section for $5. A couple months later, I picked up the Laiva TV stand for $20. I used some 1x3 lumber to make a support frame to raise the Pax panel a few inches above the Laiva. With the lumber and hardware used to make the support frame, the total cost was less than $35.
That cost went up a bit after a recent IKEA visit, when I picked up a Dioder light set on sale for $30, giving me a glass top coffee table that lights up from with.
More details and photos can be seen at on my Flickr page.
~ Larry Mac, Richmond VA

Materials: Pax
Description:
I wanted to share my hack because I thought it might give a few people with broken panels in their sliding doors hope. In efforts to save money on my wardrobe, I purchased my PAX used off of Craigslist. I saved $1,500, but had the problem of a door front that wasn't to my taste (the black EIKESDAL) and a glass panel that was shattered (IKEA doesn't sell replacement panels).

To fix the problem, I simply bought enough upholstery fabric to cover the panels, had a thin piece of plywood cut to the same size as the glass panels, and used duct tape to keep the fabric. After painting the "wooden" portions white and assembling the door, I ended up with a great wardrobe at a fraction of the price!

Here's more about how I made the doors and my finished wardrobe all put together.
~ Kasey

Materials: Pax
Description: I'm glad to show you my ikea hack! Mine it's a 42sqm room that I had to divide into a day and night zone without building any wall!

I decided to buy a huge Pax wardrobe and put it in the center of my room! I assembled a Pax component with a 90degrees rotation and left it without door: now it's my bookshelf!

Then I bought an Ikea cloth to cover the wardrobe back and my old grandparents wooden bedhead.
~ Elisa, Rome, Italy.

Materials: Pax and Bergsbo
Description: Objectives : designing and planning our attic room with storage (many for Mrs !) and a little office zone.
Initial situation : 25 sq metres without any divider and without any storage
IKEA Materials :
-2 Pax wardrobes in 100 x 240 cm
-1 pax Add-on corner unit (240 cm)
-3 Pax wardrobes in 50 x 192 cm
-5 Bergsbo doors
-1 mirror door
Other materials
-A door
-milled panels
-insulation plates (wool and hemp)
-many battens
Steps
1. Assembling and fixing against the wall the 2 huge Pax wardrobes and the Pax Add-on corner without forgetting technical shaft (phone, electricity and ethernet)

2. Fixing battens on the back of pax wardrobes vertically and up to the ceiling
3. Fixing the door with battens
4. Mounting the wall with milled panels without forgetting to put insulation plates between battens

5. Finishing the wall with milled panels

6. Reshaping of the 3 192 cm pax wardrobes to fit under the roof and fixing against the wall

7. Reshaping Bergsbo doors and fixing
Here we are ..... many many storage and a really nice and insulated divider !
~ Madotter, Paris region

Materials: Pax wardrobe and doors, tons of screws, plexiglass
Description: As I have always been into little furry things, I wanted to give something back to my syrians. We decided, absolutely unselfish, to recreate the bedroom, so the wardrobe could be turned into a "cage".
In Germany, you often stumble across modified pax-wardrobes for hamsters, rats, cats, ferrets and lord knows what else, so I just couldn't help doing it... Or my father.
My father took the Pax and laid it down, cut out the inner parts of the doors an replaced it with plexiglass so we could watch the little rodents. He also added some kind of chicken wire on the short sides of the lower part as this was the only way to get some ventilation in there.
The floor for the upper part is made from one of the side parts, so we didn't have to buy a new board and left this part open for better ventilations.
Finally, the whole thing was called "Paxadies" and two hamsters moved into their new 200x55x50cm (~6.5x1.8x1.6 ft)home.
(And yes, my entire flat is furnished with Ikea-things. The hamster-home is placed on 3 little Lack-tables, which are now hidden behind some anno stra curtains, lit by orgel vreten and so on... :) )
~ Vyerny, Germany


Materials: PAX
Description: My girlfriend and I bought and moved into our first apartment, with a tight budget we couldn't afford anything bigger then a studio apartment.

I can't imagine anyone wanting to have their bed in their living room, so we started to brainstorm. We discussed ever type of foldaway bed and room divider. Then we found IKEA's PAX sliding cupboard doors.
We bought the biggest we could find in light aluminum and frosted glass.
We measured the size of our Ikea beds and marked off the new room so it would fit our bed and some clothing space tightly in order to save as much space in the living room as possible.
I whipped up 2 wooden frames and mounted them to the ceiling, walls and floor. I then mounted the PAX doors and tidied up the frame.

I installed four IKEA LED (color changing) spots in the frame so it would light up the frosted glass.
We finished up our new bedroom with some LACK shelves and a little art work.

In the meantime we mounted 6 IKEA kitchen cupboards over the TV in the living room and integrated the TV and PC cables into the wall so we could tidily hide the Stereo and PC in the cupboards with no exposed wires. We then mounted the surround sound speakers underneath the cupboard.

This was my first ever renovation at the age of 22, by myself. So if you have a small apartment and a lot of tolerance it's not that hard or expensive to turn your studio apartment into a 1 bedroom apartment.
~ thedesignguy
***
Update: 25 Oct 2010By popular demand, thedesignguy sent me more photos. Some work in progress pics and 2 more finished views. Hope they give you a bit more of an understanding of how it all came together. ~ Jules


Materials: Pax glass closet door AS IS dept.
Description: Repurposed a slab of PAX wardrobe (glass closet door) from the AS-IS dept. into a 7 foot tall 54" wide water feature for my home based esthetics studio.
Function:
-acts as a natural hydrator for wood floors and dry winters!
-soothing sound of streaming water
-dulls conversation chatter white noise
1. build top/bottom box out of plywood
2. line with vapour barrier
3. suspend PAX glass on steel rod with "S" hooks in bottom box
4. attach a manifold (drill tiny holes into copper or PVC pipe) inside top box with adjustable valve to control less/more water flow
5. connect a $70 sump pump from Home Depot from the bottom to the top with 1.5" tubing
6. Fill up with water and plug 'er in!
Maintenance: clean with a non-chemical descaler (ie: Norwex)/microfiber cloth; fill up with water as it evaporates.
Cost to build: less than $200
Approximate retail value: $2,000+
See more photos.
~ Mary, Edmonton, Alberta

Materials: Akurum high cabinet, Pax Komplement drawers
Description: When we renovated the kitchen, we chose this high cabinet from Ikea because it's wide enough for the microwave but for storage it is terrible. It is too deep and has two big drawers which are again too deep. If you put a can in a drawer you can only see the top of the can! I like organizing but I wasn't about to label all the top of my cans!!!


The solution? Ikea's drawers for the Pax wardrobe system. We bought two big ones and my boyfriend cut them to fit the pantry. Voila! Nice sliding, solid wood drawers and not too high.
See more of the Akurum high cabinet with Pax storage.
~ Louise, Montreal
